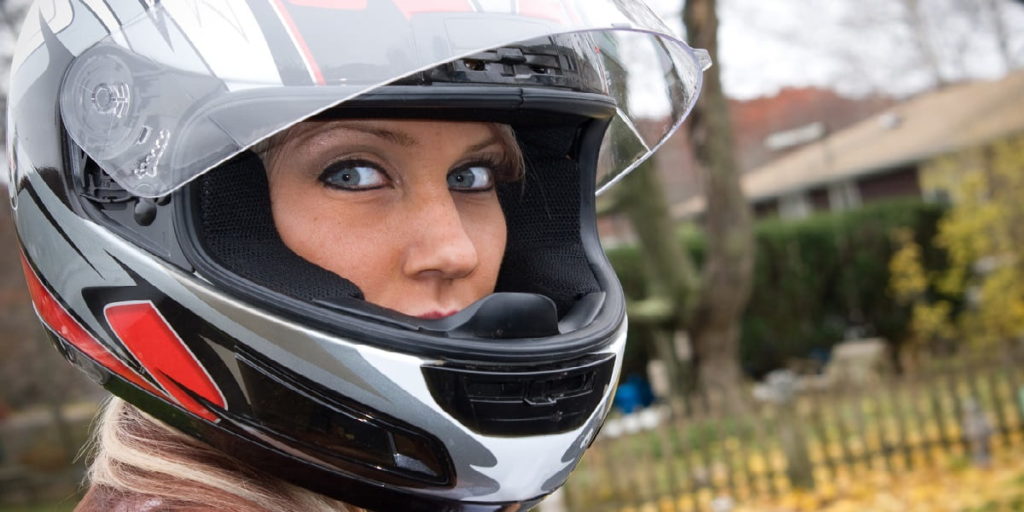
Just look at the people around you; round, oval, wide, thin, we all have differently shaped heads.
With the melon I have on my shoulders, I know better than most.
But I also know that if you pay attention to a few essential things, anyone can get a helmet ideal for their noggin and make it fit just right.
Here’s my advice.
Get the Right Size and Shape
How Do You Know Your Helmet Is the Right Size?
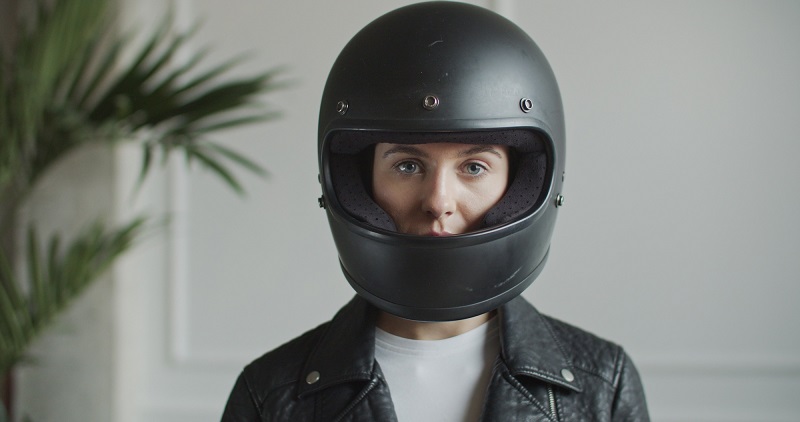
If a helmet is the right size, it will, well, fit.
It will be snug on your head and feel stable, but it won’t cause any pain or pressure.
If this seems vague, it’s probably better to focus on what makes a helmet the wrong size, whether too small and tight or big and loose.
Let’s dive deeper into that.
How Do You Know Your Helmet Is the Wrong Size?
Too Tight
For the most part, you can feel if a helmet is too tight. This is the main reason you should try it on in the store before buying it or if you buy online, make sure that you can send it back for a different size.
However, many motorcycle riders have a tough time telling if the helmet is really too tight or if it just isn’t broken in yet.
Don’t worry. It’s definitely possible to figure this out before you buy a helmet. Just make sure you wear it around for 20-30 minutes, no matter how many weird looks you get wandering around the store.
A helmet that’s too tight will eventually start to hurt your head. You may begin to feel a dull pain in your ears or temple or even a headache in your crown or forehead. Just pay attention to actual pain and tightness.
On the other hand, a helmet that isn’t broken in won’t hurt, just feel a little cramped.
If it seems like the cheek pads or inner lining on the crown press a bit too much against your head, these will soften and adapt to your head shape. This is the breaking-in process, which I’ll cover in a minute.
Too Loose
A helmet that’s too loose won’t hurt necessarily. Instead, it will wobble around, rattle, and make a lot of noise.
For this reason, it’s also a good idea to ask the store if they’ll let you try out the helmet on your bike in the parking lot. Or, if you buy online, take it around the block to see if you should exchange it for a smaller size.
Your helmet should be snug.
Even without riding, you can probably notice if the helmet bounces around on your head. If you get up to higher speeds on your bike, you’ll notice that the wind rattles it against your head.
If adjustments, which I’ll also go over shortly, don’t keep it from bouncing around; you probably need a smaller size.
Sizing
Unfortunately, helmet sizes aren’t exactly standardized across the market. You might need a large in one brand but an XL in another.
This is further complicated because not all brands have the same range of sizes.
Most top-shelf brands usually divide their helmets into more sizes, sometimes even five or six different sizes, so that you can get one more closely tailored to the exact size of your head.
Budget motorbike helmets may only have two sizes, or even just one, so the sizing is more likely to be a bit off.
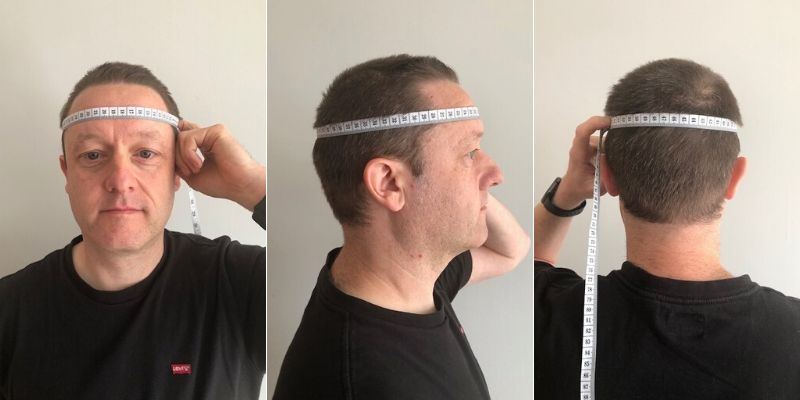
To select the right size, you’ll have to measure your head. Take a measuring tape and wrap it around the widest part from your forehead to the back of your skull.
This gives you your head circumference. Now you can check the helmet manufacturer’s sizing chart to see which size you need in their helmets.
Head Shape
Head shape is one of the most overlooked aspects of helmet fit, but it’s arguably one of if not the most important. Everyone’s head is shaped so differently, so it makes sense that we can’t all wear the same shaped helmet.
Helmet manufacturers rarely make the same helmet model for different head shapes, but they do often make different models for different head shapes. Plus, different brands tend to fit better for different head shapes versus others.
Specifically, the three head shapes are:
- Round oval: A head with this shape is about as wide ear to ear as it is long front to back. This head shape is rare, so helmets that fit it are hard to find. (Read our guide to the best helmets for round heads.)
- Intermediate oval: This is the most common head shape, a head that’s slightly longer than it is wide from ear to ear. Most helmets fit this shape.
- Long oval: This head shape isn’t quite as rare as round oval, but it’s not that common either. A head with this shape is significantly longer than it is wide. (Read our guide to the best helmets for long oval heads.)
Most stores or vendors will note the head shape of the helmet, so pay attention to this when buying, especially if you have one of the less common head shapes.
How to Break in Your Helmet
It might sound silly, but the best way to break in your helmet is just to wear it. And I don’t mean while riding your motorcycle. Unless you go on long tours, you probably aren’t wearing your helmet that long, so it will take multiple rides to break it in.
Instead, try wearing the helmet for a few hours someday when you have free time. Or split this up over a few days.
Put the helmet on and watch a movie. Eventually, the lining of the helmet will adapt to your head shape.
You can do a few things to help accelerate the breaking-in process, though. First, you can massage the inner lining with your hands. If the lining or parts like cheek or crown pads are removable, take them out and squish them a few times with your fingers.
Additionally, if the inner lining or any part of it is washable, you can wash it before your first ride. This will soften the material and make it adapt to your head faster.
Other Adjustments to Help Your Helmet Fit Better
Before you return your helmet for a different size, there are some adjustments you can make that could help you get the right fit.
Tighten the Chin Strap
This is the most common adjustment riders need to make their helmets fit better. You can make an otherwise loose helmet fit snugly if you fasten the chin strap accurately.
Make sure the buckle is clasped firmly and that the strap isn’t twisted in the buckle. The buckle itself should rest just to the side of the chin on the jawline. This will give you easy access without preventing the strap from adequately gripping the chin.
Once buckled and tightened, the strap should firmly press against the skin but not so much that it pushes into your throat. If you’re choking yourself and the helmet is still loose, you need a smaller size.
Adjust the Inner Lining
Many helmets these days have either fully removable inner linings or removable parts like cheek and crown pads. Depending on how they attach, they can come out of place. If your helmet starts feeling awkward, try taking the pads out and putting them back in correctly.
Reposition the Helmet
Your helmet might not fit right simply because you’re putting it on wrong. Make sure you’re positioning it correctly before deciding you need a bigger size.
The top should rest firmly against your forehead so that your brow stabilizes it. This means about a finger’s width or so above your eyebrows. If it slips down from that position, it’s too big. If you can’t even get it into that position, it’s probably too small.
The cheek pads should press up against your cheekbones so that the helmet feels stable and firmly in place without hurting.
Lastly, no part of your helmet should block your vision. Your eyes should be entirely within the face shield so you can move your eyes around and still see.
If the helmet slips so that it begins to cover your eyes or slides into your field of vision when you turn your head, you need a different size.
By making proper adjustments and getting the appropriate size and shape, you can make your helmet fit just right. Not only will it be more comfortable, but safer too.